
Uploading and Resizing Photos
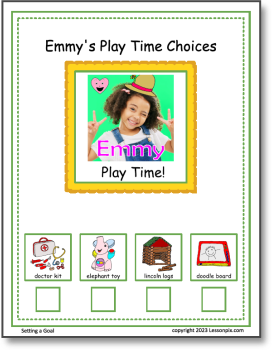
Need visuals with photos? Maybe use a picture of a child's lunchbox or best friend in their visual schedule, learning games, or communication board. Here's how to make it work... and look good too!
Upload photos
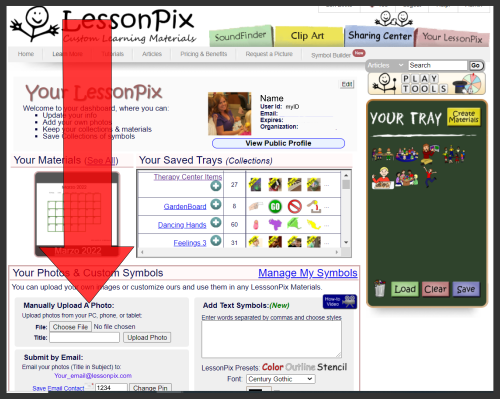 From your desktop, go to the "Your LessonPix" tab and scroll down to "Your Photos & Custom Symbols". Here you can see a place to upload and an e-mail to send into your account.
- Upload: Click Choose file and find the file on your computer to upload. Then choose a title that would be used in your material (such as "Johnny", "Art Room" or "My Lunchbox")
- Submit by E-mail: E-mail photos from your phone to this account e-mail. Make the subject line the title. In seconds, (depending on your internet) the photo will appear in this section. This e-mail address is specific to your account and only works for uploading images.
- Mobile App: Go to LessonPix.com on your phone's browser. When you log in, you can take photos that go straight into your account. Just go to upload photos under the the "Your LessonPix" tab.
Resize Photos
LessonPix templates provide a defined square area for the symbols in your tray. Photos are generally rectangle - either portrait or landscape. Rectangular photos will fit in the box to the maximum size of the longest edge (length or wirdth). This will leave white space either on top/bottom or left/right.
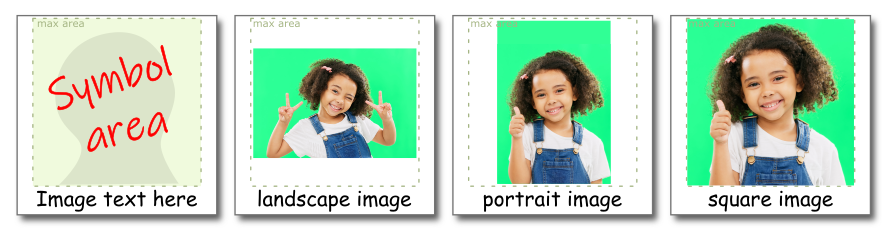
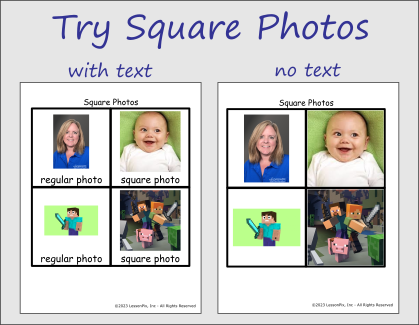
Square photos fit perfect!
You can take square photos or crop photos square with your phone before you upload them to your account. This will make a big difference in the look of your material.
Edit Photos in LessonPix
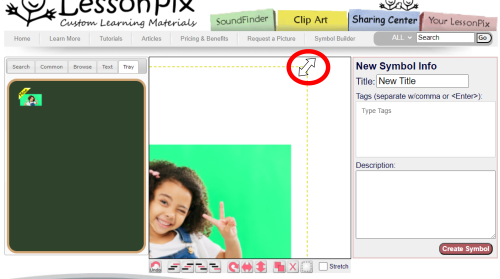
You can edit your photos in LessonPix using the Symbol Builder. To begin, place the uploaded photo in the tray. Then you can drag the image to the working area.
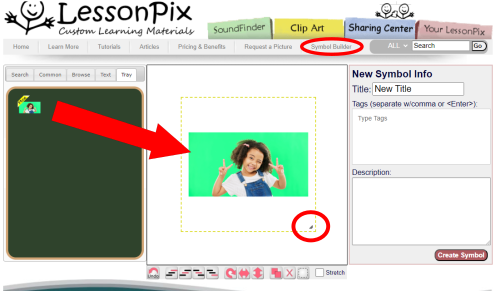
Grab any corner and drag well outside the working area- as big as you can get! Then you will need to click on the picture and move until you see a yellow corner and repeat to the desired size.
Click on the photo again to center image how you would like.

You can combine other symbols or text with your photo. Learn more about our Symbol Builder here.
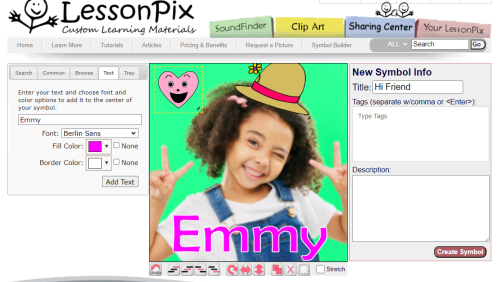
Name your symbol and click "Create Symbol". You can find this symbol under "Your LessonPix" any time, until you choose to delete it.
Have fun making your custom materials even better!
 Facebook
 Twitter
 Pinterest